USB Connection Troubleshooting (Legacy iOS Edition only)
USB Connection Troubleshooting (Legacy iOS Edition only)
We occasionally run into people who are unable to get Eyeware Beam to function via a USB connection.
These are the actions we recommend you take to figure out what’s causing the problem.
Reinstall the Eyeware Beam PC software:
- Quit the Eyeware Beam PC software.
- Uninstall Eyeware Beam PC software.
- Delete the Eyeware folder located here: C:\Users\[your_username]\.Eyeware (please make sure to choose the folder with the username you are currently logged in with).
- Install Eyeware Beam PC software.
- Restart the Eyeware Beam iOS application.
Make sure you have installed and opened the latest iTunes version:
- Download & open iTunes for Windows. The USB connection does not work without iTunes installed on your PC.
- Plug your iOS device into your computer.
- Start Beam.
Make sure you have an iPhone or iPad model that support Face ID:
- List of the supported devices: here
Restart the PC:
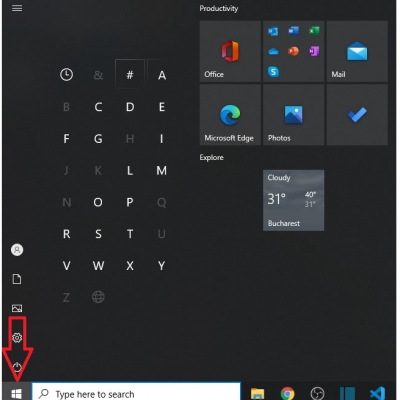
- Click on the “Start” button
- Click on the ‘’Shutdown’’ button
- Click on “Restart”
Unplug Your PC from the Power Source:
- Shut down your PC.
- Unplug the power cable from the electrical socket.
- Leave the PC unplugged for up to five minutes.
- Plug the power cable back into the electrical socket.
- Check if the PC detects and recognizes the USB device.
If you are experiencing the “USB Device not recognized” error only occasionally use the steps below to pinpoint the issue:
- Connect your iOS device to your PC using a different USB cable.
- Connect your iOS device to a different PC.
- Connect a different iOS device to your PC.
After finding the issue please follow one of the solutions described below.
Windows Update:
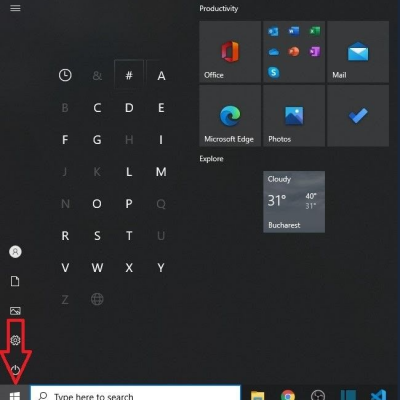
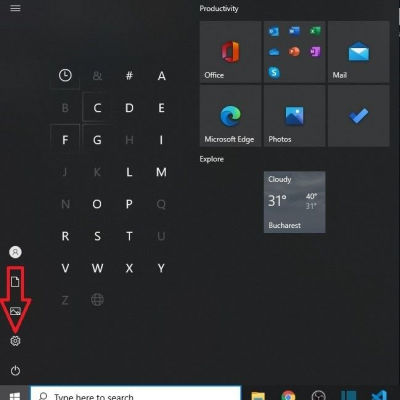
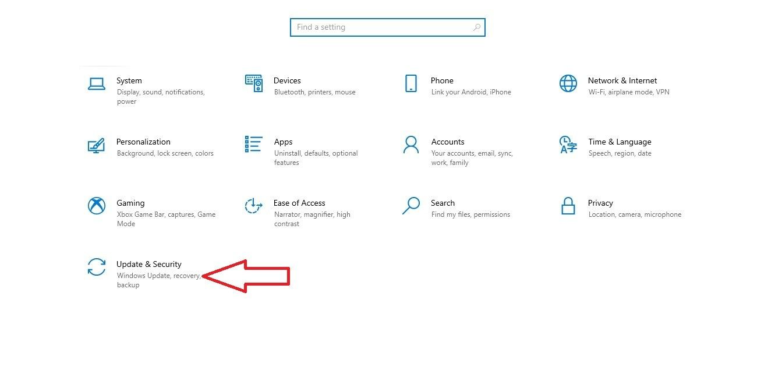

5. When ready, install the updates.
6. Restart your PC.
Update your USB drivers:
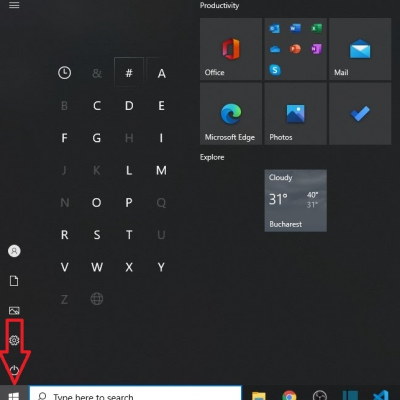
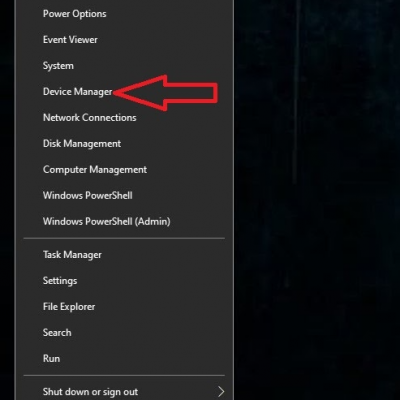


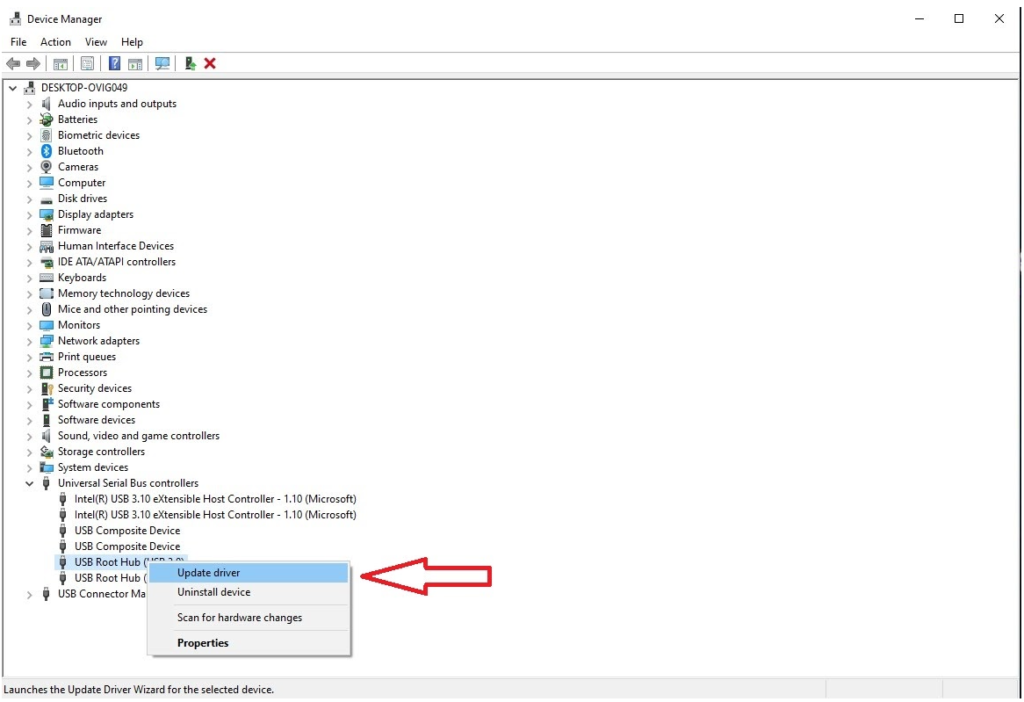
6. Repeat steps 4 and 5 for all the ‘USB Root Hub’ drivers on your device.
If your PC determines that you already have the best driver version installed on your device follow the steps below.
Modify USB driver power management settings:
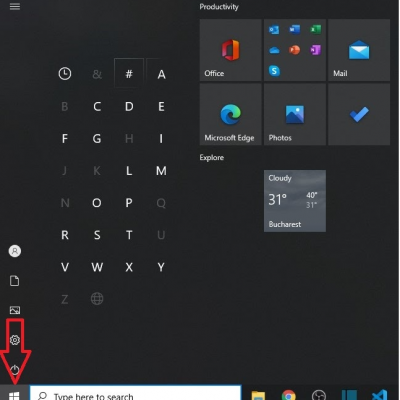
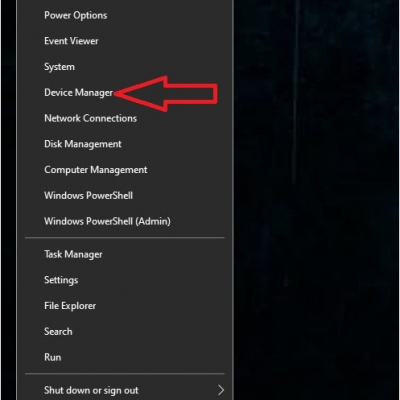


8. Repeat steps 5 – 6 – 7 for all the ‘USB Root Hub’ drivers in your PC’s Device Manager.
Disable USB selective suspend settings:
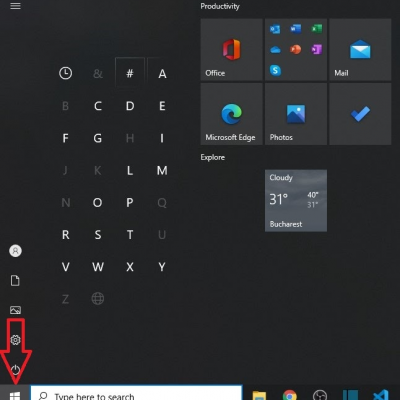
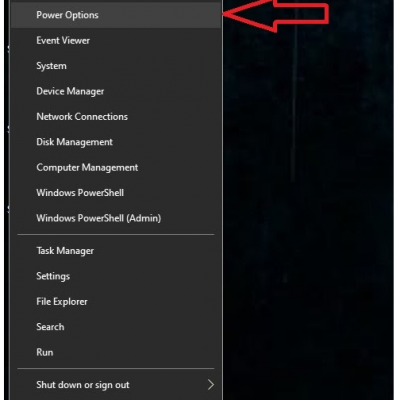
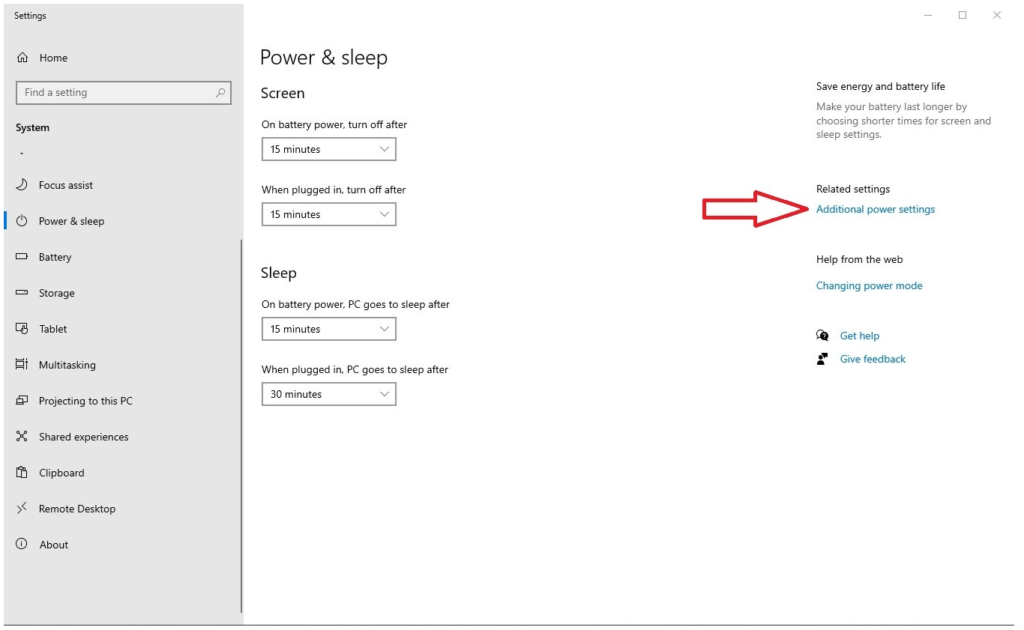
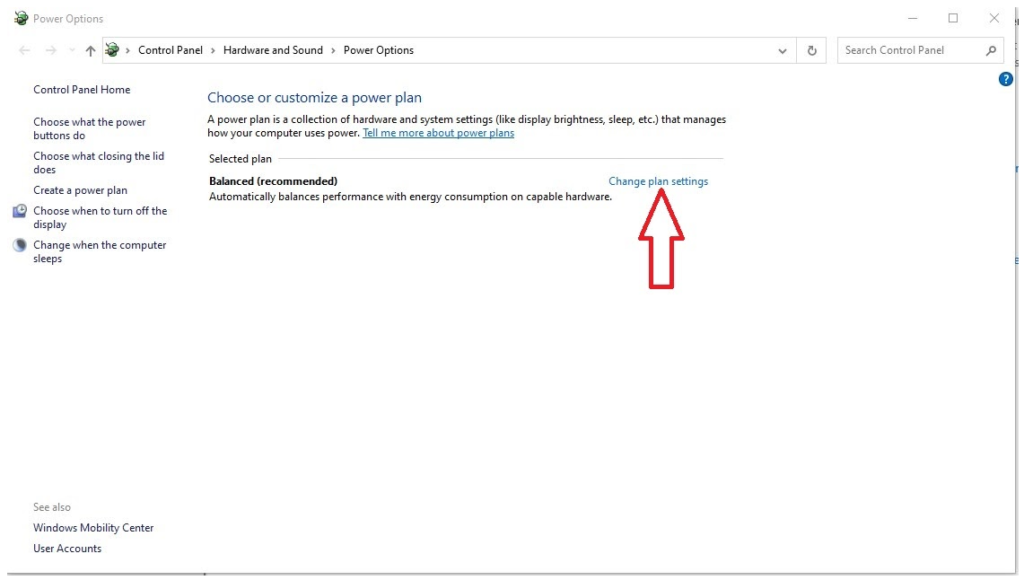
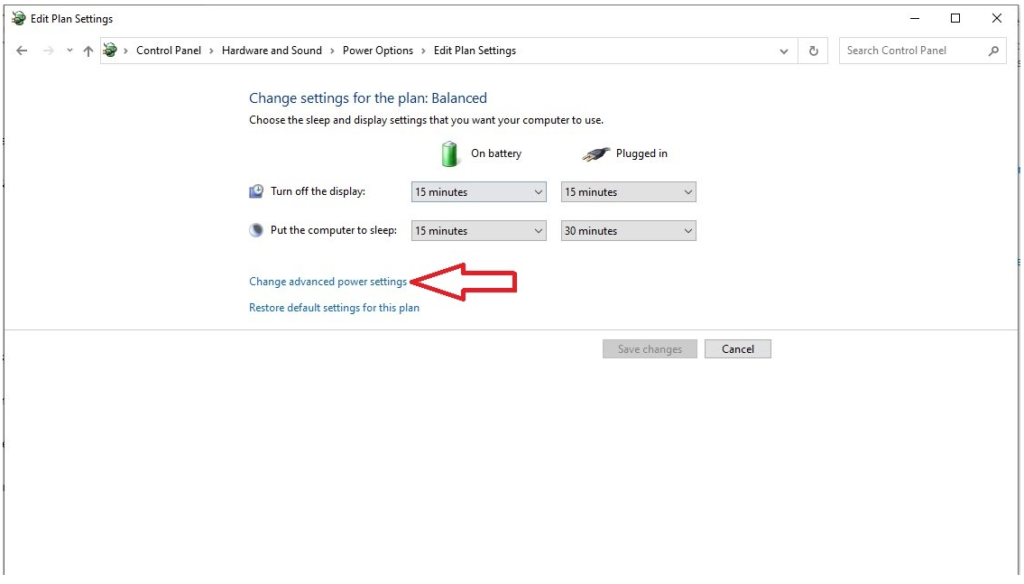


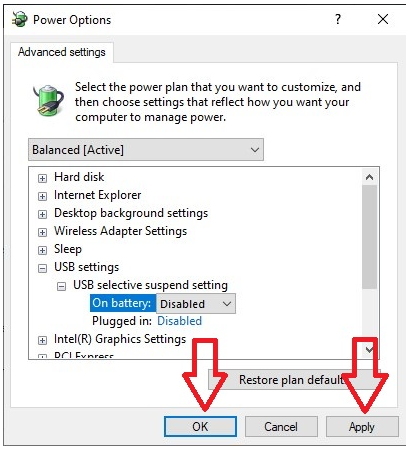
If you are still experiencing issues with the USB connection follow the steps below.
Restart the Apple Mobile Device Service:
Quit iTunes and disconnect any iOS that’s currently connected.

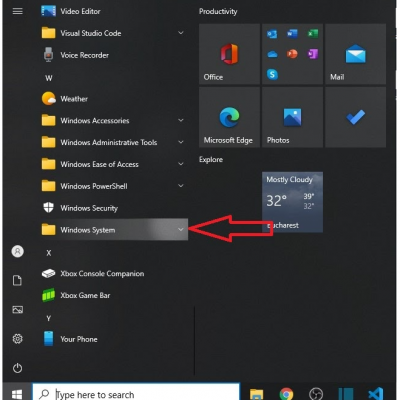
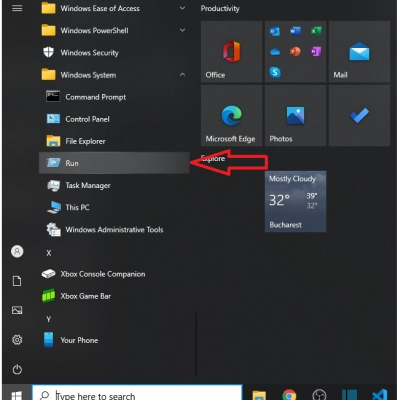

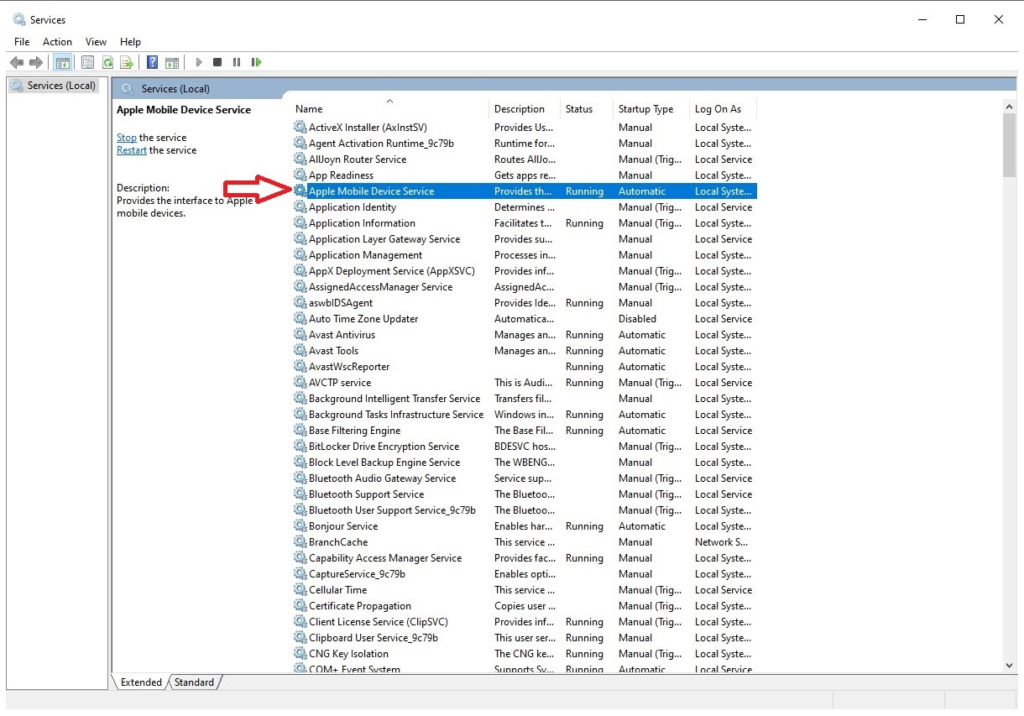
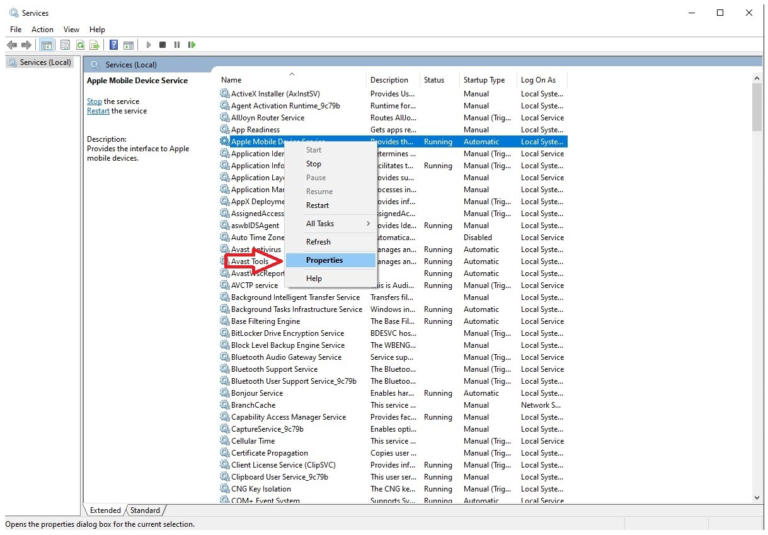


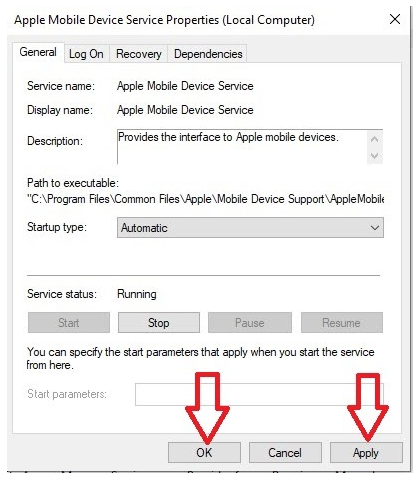
12. Restart your PC.
13. Open iTunes and connect the device.
Update the Apple USB driver:
Unplug your device from your computer.
Unlock your iOS device and go to the Home screen.
Plug in your device (Quit iTunes if it opens).


9. Launch iTunes and attempt to connect your device using your USB cable.
If you’re still experiencing issues in regards to connecting Beam via USB please contact the Eyeware Beam support team at [email protected].
