(Legacy iOS Edition) Setup Guide
(Legacy) Setup Guide for iOS Edition
Turn your iPhone or iPad into an eye tracker with the legacy Eyeware Beam iOS Edition following these onboarding steps.
!
This guide is here for reference only for legacy users. Please download the Beam Eye Tracker here and use the Beam iOS app as a camera input following the instructions here: beam.eyeware.tech/ios-setup.
Getting Started: Follow the easy 12-step process to set up Eyeware Beam
1
The iOS app for your iPhone or iPad captures your head and eye movements, and accompanying Eyeware PC software translates those movements into on-screen actions in games and streams. Download the Eyeware Beam iOS app from the app store.
We request your email address during the iOS app installation to send you the free accompanying PC software installer and download link to iTunes for PC. The PC software installer is required for tracking to work, while iTunes for PC is required to enable USB connection. Enter your email and select “Send Download Link” on your iOS device.
Open the email from [email protected] and click “Download Eyeware Beam PC Software” and click “Get iTunes to connect over USB”.
 Setup Guide 1")
2
Select the PC monitor you want to use with eye and head tracking
Head and eye tracking will only work on one PC monitor. Designate the PC monitor you will use as the main display if you use multiple monitors. To choose your main display:
- Right-click on an empty space on the Desktop and select Display Settings from the menu.
- Scroll down to select Make this my main display and then Apply to choose your primary display.
 Setup Guide 2")
3
Start the Eyeware Beam PC software & iTunes for PC software
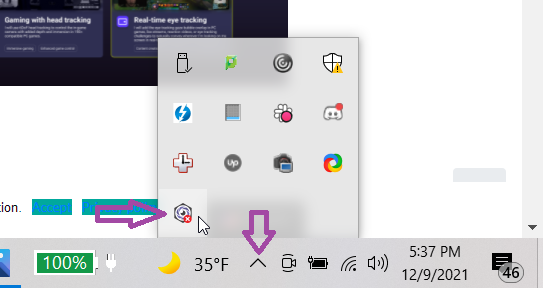
If the PC software did not start automatically after installation, locate the Beam installer file in your PC downloads folder to open it. If you can’t find the software after opening it, double-click the purple Eyeware Beam icon in the system tray usually located at the bottom right of your screen.
Open the iTunes software you also downloaded and sign in to the iTunes Store with your Apple ID if you want to connect the Eyeware Beam iOS app and PC software over a USB connection instead of Wi-Fi.
 Setup Guide 3")
4
Choose head tracking or eye tracking to begin the onboarding process
The first of five stages during the PC software onboarding process asks you to choose between “Gaming with head tracking” or “Real-time eye tracking.” Regardless of which option you prefer, you may still enable the head and eye tracking after the final onboarding stage.
Note: Always leave the Eyeware Beam iOS app open on your iPhone or iPad. Head and eye tracking will not work otherwise (i.e., the Eyeware Beam iOS app must remain in the foreground at all times).
 Setup Guide 4")
5
Connect the iPhone/iPad and Windows PC over USB or Wi-Fi
Eyeware Beam works when your iPhone or iPad and Windows PC (Windows 10 or above) communicate together over USB or Wi-Fi.
USB Connection versus Wi-Fi connection: The USB connection reduces CPU usage of the iOS app by 20% and offers a more stable connection in comparison to Wi-Fi. We recommend users connect over a USB connection whenever possible.
Click to select either panel to connect with USB or Wi-Fi. Click next.
6.a
Configure the USB connection
Open the iTunes PC software on your computer have you not done so already in step 3. On your iPhone or iPad, select “Streaming.”
Connect the iPhone or iPad to your computer’s USB-C or USB port with a compatible cable. Click next once the connection status in the box below changes to green and says “Connected successfully.”
Read more to troubleshoot USB connection issues.
6.b
Configure the Wireless connection
Verify that your PC and iOS device are both connected to the same Wi-Fi network. Turn off “Auto-Join” on each device to avoid them accidentally switching to other Wi-Fi networks that are in range.
On your iPhone or iPad, select “Streaming.” Enter the IP address shown on your iPhone or iPad Eyeware Beam app screen to the PC software. Click Save. Click next once the connection status in the box below changes to green and says “Connected successfully.” Click next.
Note: If you have issues connecting the device, please refer to our troubleshooting connection issues page.
7
Place your iPhone or iPad in a stable position next to your PC
Watch the video on the right or follow the visual guide to correctly place your iOS device relative to the main PC monitor that you selected to use head and eye tracking. Refer to step 2 if you have multiple monitors.
Use a phone mount to achieve optimal positioning and stability if possible. Any mount will work as long as the iPhone or iPad remains stable while gaming or streaming. Click next.
Note: Enable FaceID on your iPhone or iPad if you have never done so before.
 Setup Guide 8")
8
Match the device position to what you choose in the PC software
The PC software provides multiple device placement options. Select the position that most closely represents the real-life placement of your iPhone or iPad device relative to your PC monitor or laptop screen. Click on the iPhone icon to match the orientation of the selfie camera notch to the actual direction of your iOS device. Click next.
Note: Those with a monitor may place their iOS device beneath or to its side, while laptop users may position their iOS device to the side of the laptop screen. Users unable to put the iOS device below the monitor may try an alternative solution when gaming with head tracking described in the FAQ.
 Setup Guide 9")
9
Calibrate iPhone or iPad tracking in the PC software
The quality of the head and eye tracking is affected by certain external factors. You must always re-start calibration any time a condition changes, including when the iOS device/PC moves. Set the following conditions for optimal performance. Click next.
- Ensure the iPhone or iPad will not move.
- Your face is in front of the camera the entire time.
- Make sure that your face is well illuminated.
- Do not blink or close your eyes when you click on the calibration points.
- There is no firewall blocking the PC software connection.
 Setup Guide 10")
10
Click the 9 calibration points in the PC software
Drag and click your mouse in the center of each white circle that appears on your PC screen. Carefully ensure that you look with your eyes open and without blinking each time you click. Click next once you have finished.
 Setup Guide 11")
11
Click finish to turn your iPhone or iPad into an eye and head tracker
You successfully calibrate your iPhone or iPad when you see the two purple circles moving inside the rectangle following your head pose. The moving circles indicate that both eye and head tracking are working and active.
You can restart the 9-point calibration anytime by clicking on the Calibrate button in the PC software menu. If you can’t find the Eyeware Beam app in the future, locate it in your system tray. Click finish.
 Setup Guide 12")
12
Use Eyeware Beam to enhance PC games and live streams
You’ve set up Eyeware Beam successfully. Now it’s time to use it in PC games and live streams. Follow the guides below to get you started.
Head Tracking for Gaming with Eyeware Beam
Use head tracking in your simulator games to dive into an immersive experience and feel like a real pilot or driver.
Eye Tracking for Streaming with Eyeware Beam
Take your live stream to the next level and share with your audience what you are looking at or replay moves with the eye tracking overlay to discover hidden behavior.
 Setup Guide 13")
